Powered by Blogger.

Thursday, March 28, 2013

Pin It To Win It: Easter Edition

I know I'm not alone when I say I love Pinterest. Like, I really love Pinterest. I seriously have an unhealthy addiction to it. I find myself using it for just about everything these days. Cleaning tips...check! Recipes...check! Crafts...check! Decorating ideas...check! I really don't know what I did before Pinterest. 

In all honesty though, I find Pinterest to be a great resource for holidays. And with Easter only a few days away, I compiled some of my favorite ideas for Easter fun with little ones.

1) A Bathtub Easter Egg Hunt from Growing a Jeweled Rose
2) Bunny Hand Prints
3) Bunny Pancakes from Everything Evans
4) Bunny Craft from Raise A Boy
5) Lollipop Garden
6) Natural Easter Egg Dye from Ecocrazy Mom
7) Bunny Bottom Pretzels from  The Queen Says
8) Egg Counting from Creekside Learning
9) Bunny Money from Crafty Journal

Wednesday, March 27, 2013

Want It Wednesday

I need new pots and pans and have been researching "green" cookware options. I haven't made up my mind yet on which ones to buy, but these beauties (Bialtti Aeternum) are high on my list!


Tuesday, March 26, 2013

Crockpot Mashed Potatoes

To go along with our faux Thanksgiving dinner the other night, I made mashed potatoes. Normally, I make them the old fashioned way....boil the potatoes, mash them, and throw in some seasoning and milk. But on Sunday, I didn't feel like spending the whole afternoon in the kitchen worrying about side dishes so I tried a crockpot version. Not only were these super easy, but they were incredibly delicious. Needless to say, I will not be making mashed potatoes the old fashioned way again. I couldn't find the original source for the recipe but I wish I could since someone deserves a lot of credit for this gem!

Crockpot Mashed Potatoes

5 lbs sierra gold potatoes or red potatoes, diced with peel
• 1 cup water
• 1 cup butter, cut into chunks
• 1 tablespoon salt, plus
• ¾  teaspoon ground black pepper
• 1 1/3  cups milk, warmed

1. Place the potatoes, water, and butter into a slow cooker.
2. Season with salt and pepper.
3. Cover, and cook on High for 4 hours.
4. Do not remove the excess water from slow cooker. This adds to the creamy texture.
5. Mash potatoes with a masher or electric beater, adding the desired amount of warm milk to achieve a creamy consistency.
6. Keep warm on low until serving.
7. Potatoes keep consistency for a couple of hours after mashing. Just keep the lid on the slow cooker and serve directly from there.

Menu Monday 3/25

Call it spring cleaning (or just plain craziness), but I've spent the last two weeks cleaning out and getting organized. No room or closet has been safe, including our freezer. Spending every second on cleaning/organizing projects left little time for cooking, so I used a lot of freezer meals (which helped us work our way through our freezer inventory). An unexpected benefit of eating freezer meals was that I found a turkey that had been hiding in the dark recesses of the freezer. I knew it would be a perfect Sunday dinner for us and that the leftovers would serve as a starting point for our meals for the rest of our week.

Sunday: Turkey
Monday: Spaghetti
Tuesday: Southwest Turkey Sandwiches
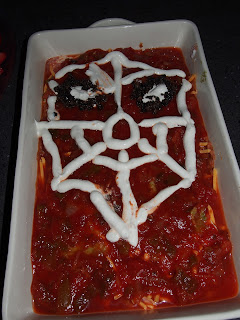
Wednesday: Potato and Turkey Lasagna *
Thursday: Italian Turkey Soup
Friday: Pizza
Saturday: No plan (we have a party to go to...yea!)

*New recipe 


I shared this menu on Weekly Menu Monday:

Thursday, February 28, 2013

Superhero Birthday Party

Growing up, birthdays were a big deal in my family and I've continued that tradition now that I have a family of my own. So when C turned three a few weeks back, there was no doubt that we would have a party for him. And given his love of all thing superheros, there was even less doubt about what the theme would be.

Since C loves all of the superheros the same, asking him to pick just one for a theme was just impossible; so we chose all of the superheros. I found an awesome invite on Etsy from MetroEvents that totally fit the bill!


Since I wasn't picking just one character, I chose to focus on vintage comic sayings. I made this wreath for the front door using two small, styrofoam wreathes and ribbon. I added the bam and pow to go with the theme.


 We have a small entryway so, this is what guests saw as they came through the front door.


I made capes for all of the kids and they doubled as decorations until everyone got there.

We typically have a dessert table set up in the dining room and that's where we sing and do cake, so I wanted something special here.


I tried to carry the theme through to the food as well. At the kids table, we had Spiderman juice boxes, goldfish, peanut butter and jelly batwiches, and Avenger pizza pockets (which hadn't gotten put out at the time of this photo).


We also had a Captain America fruit tray and Spiderman seven layer dip as "super" additions to the adult food!


Beyond the kitchen is our family room, which usually serves as the kids play areas at our parties and where we open presents.

  I planned a lot for this party and, in the end, there's nothing I would have done differently!


Wednesday, February 27, 2013

Want It Wednesday

It's still cold here on the East Coast, but I'm dying for warm weather. This sweater from Madewell screams Spring to me!

Fairweather Cardigan in Doubledot

Tuesday, February 26, 2013

Tips for Tuesday

Right after C's party, we left for Disney World. I knew from the start that we would only really have a day to eat any leftovers so I planned our party food accordingly.

We served buffalo chicken, hotdogs, and sandwiches as the main dishes. The buffalo chicken freezes well so it came down to eating the hotdogs and the sandwiches. There was no way we could figure on eating the leftovers of both (I almost always have way too much food) so I decided to change our usual sandwiches. Instead of a preassembled sandwich tray from a local deli, I opted for a lunch meat tray. We offered all the fixings and people seemed to like the chance to customize their sandwich. When the party was over, we did however have leftovers, which leads me to my tip...make sandwiches ahead of time and freeze them!!!! 

I heard people talking about this at the salon one day when I was getting my haircut and knew I had to try it. It's not that making a sandwich takes all that long, but some days are just crazy (or I'm just especially lazy) and sometimes I have too much lunch meat in the fridge and I hate to waste it. 

I was very skeptical the first time I tried this. I made a few sandwiches and the only thing that I changed was the order in which I constructed the sandwiches and the way I bagged them. Normally, I put the condiment on the bread and then the cheese followed by the meat and just throw the sandwich in a plastic bag. When freezing, I put the condiment on the cheese not on the bread (that way the bread doesn't get soggy) and wrap them in saran wrap before bagging them. After the sandwiches were made and frozen, I just had to wait for a chance to try them on my unsuspecting husband (he's such a good sport). Since he takes a sandwich every day, K is very aware of when something changes and is usually quick to point out when it's a change for the worse.  So when I first gave him a "premade" sandwich, I held my breath waiting for him to call and complain about  question the sandwich. Much to my surprise, he never called. So, I tried a frozen sandwich the next day and the day after that and the phone never rang. Finally on the fourth day, he called and asked why I had started to plastic wrap his sandwiches....this was a great way to find out that there was no discernible difference between a fresh sandwich and a frozen sandwich!

Since my initial test, I try and keep a few sandwiches on hand in the freezer. But after C's party, I managed to make and freeze ten sandwiches, which was great for when we got back from vacation because I didn't have to run out and get ingredients for K's lunch and I could just ease back into reality!